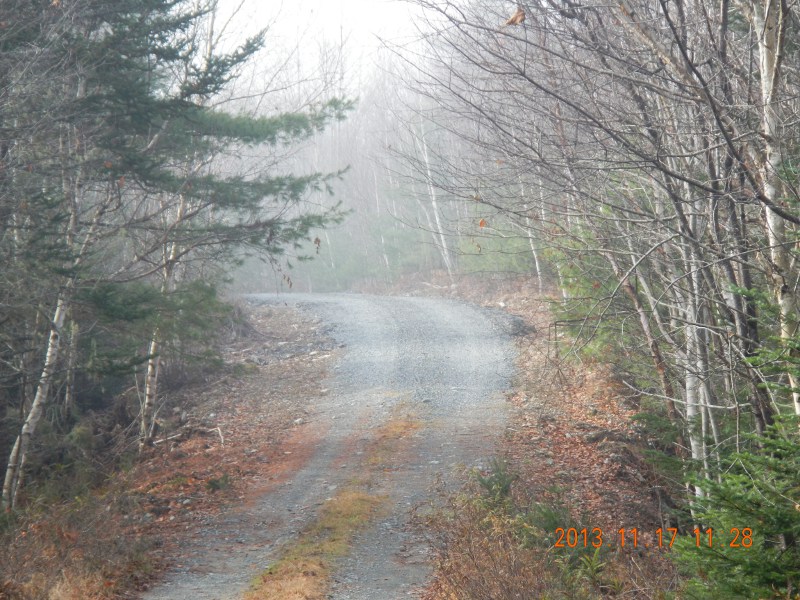
road
- Details
- Written by: Bob Allan
- Category: road
- Hits: 3954
End of season summary: 2016-09-30
We have completed the road work for this year. Thanks to everyone who has participated this year. This brief update to provide a link to a recent video showing the road work and a few notes:
Here's what we got done this year:
- Installed the culvert where a washout had occurred (this was 2016 work done early)
- Cover the previously repaired area with additional gravel at about 170 feet per load (estimating somewhere around 2" deep)
- Complete the hill repair and replace a wooden culvert on the outbound side of the hill [ditching done 2016-08-22]
- Continue the inner rebuilt section out through a wet-spot to the pit.
- We pulled a pile of rocks, some much larger that we could by hand. This makes the road smoother in places and significantly reduces the bashed-bottom on shorter cars.
- filled the deepest pot holes with shale including a full load over one of the snow gulleys.
- ditching and grading in a few places to improve run-off
- extended the road outward from the top of hill section and wet spot out though the wet spot 4 and up the hill on the far side.
We left some exposed shale in the potholes and the snow gulley to be efficient about the use of gravel. Those are likely next-up in our planning for future years.
We built a beaver excluder to keep the culvert clear. It's anyone's guess if the industrius little beggers will build a giat dam around our fence, but at least it won't be in the culvert.
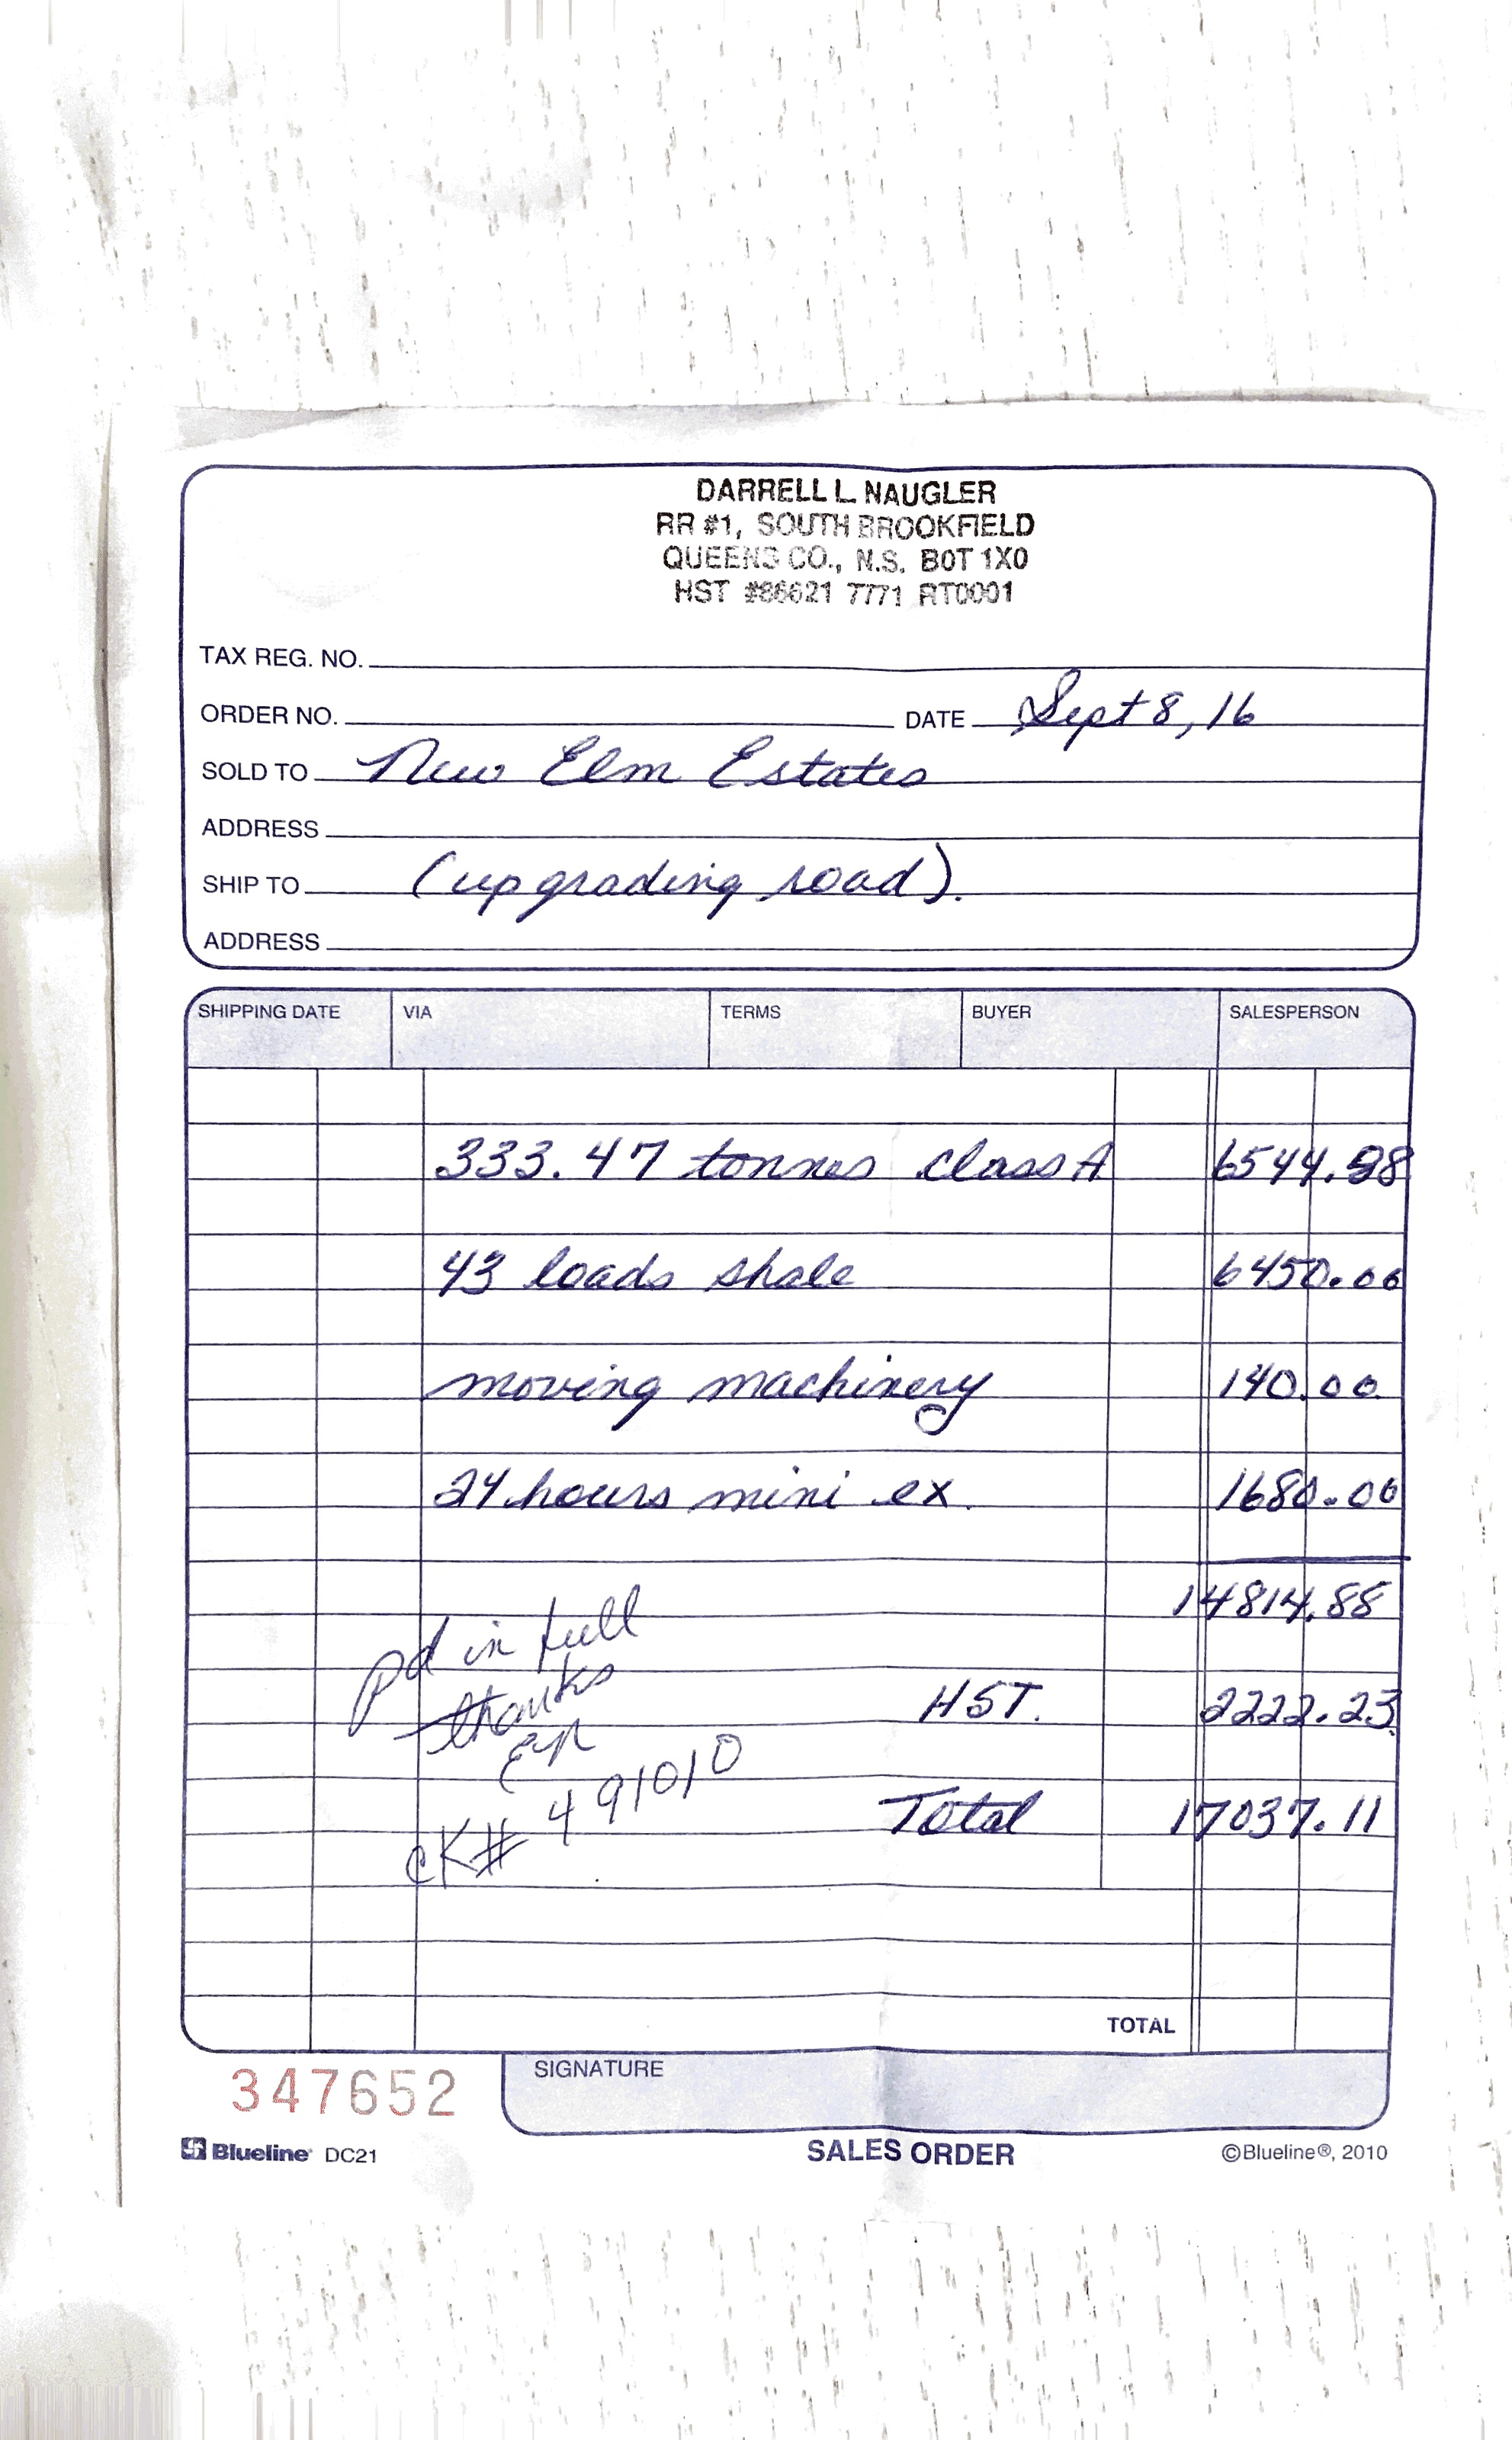
We received and paid Darrell his invoice ($17,037,11)
I posted a high-def version of a driving tour. You can use Vimeo tool while watching the link below to adjust the resolution appropriate for your device.
We can all think about the work plan for comming years. Some folks elected to contribute one year at a time so we expect a small budget for 2017 and a larger one again in 2018. Let's all think about our favorite pot hole or area for improvement and we can chat it over a camp fire and come to agreement about our future plans.
The remaining work areas include:
- The road around the gravel pit hill between the two extended areas of new work. We have started some grading and ditching on the inner end and pulled some rocks. This likely needs more work to remain dry and hard and smooth. Notice the widened area on the inner end - a dump truck pulled off there without sinking so it's more solid than it looks.
- including the low spot where some puddles form
- The road out-bound from the outer section of new road. There is more shale than gravel cover and the ditching should likely be extended further out and up that hill. This leads on through
- Patch 1: shale filled
- Patch 2: shale filled
- Some pretty good road with a few low spots though to Flying Bear Pond
- The Flying Bear Pond causeway. We patched with a bit of shale and we may want to do some more gravel cover and a bit of ditching or grading along that stretch.
- The outer stretch including the two Snow Gulleys and Patch 4. We should think about covering that shale with gravel sometime in the next couple of years before it disolves. There is likely more work to do along that stretch but the base is pretty solid so we should expect slightly lower cost per foot on that.
Hope this helps us all stay in touch with the road project.
Thansk, Bob.
Cost details for road work in 2016
| Item | Amount | Cost |
| Class A Gravel | 333.47 Tons | $6,544.88 |
| Shale | 43 loads | $6,450.00 |
| Machine Time (mini excavator) | 24 hours | $1,680.00 |
| Machine time (moving it around) | 1 lot | $140.00 |
| Subtotal | $14,814.88 | |
| Tax (HST) | $2222.23 | |
| Total | $17,037.11 |
- Details
- Written by: Bob Allan
- Category: road
- Hits: 3883
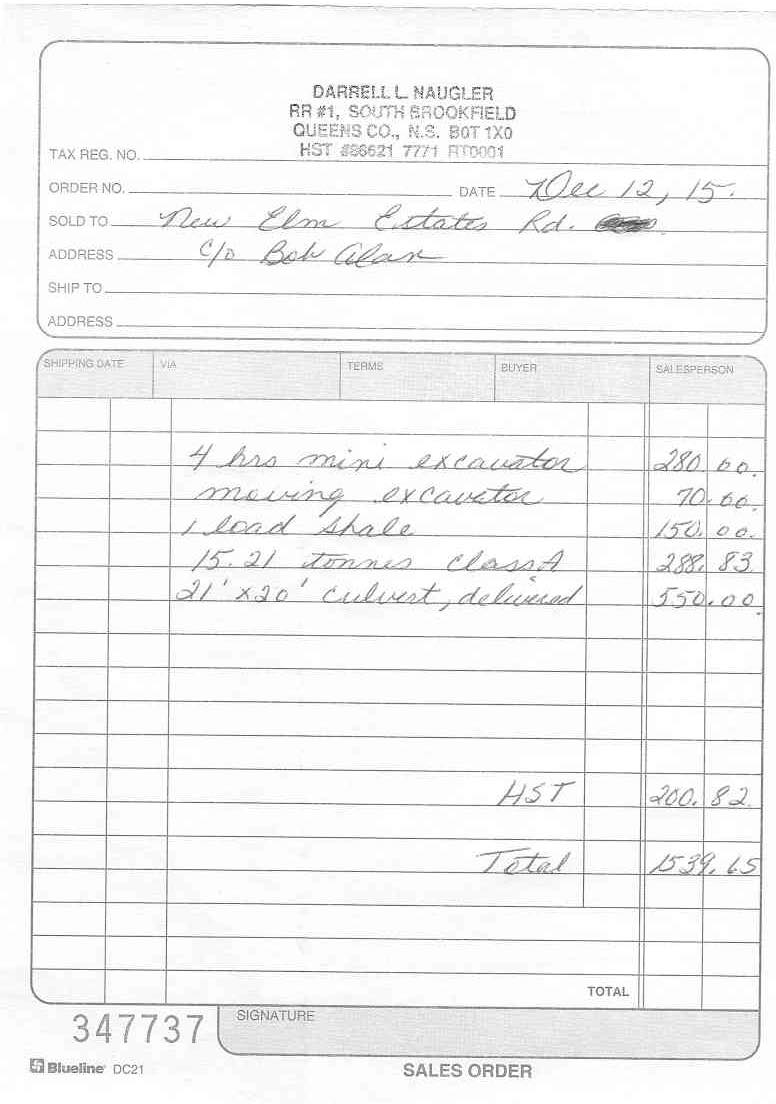
The 2016 year started off early with a somewhat urgent culvert installation in December 2015. With thanks to Darrel for patience, we arranged with some of the lot owners to gather 2016 and future year contributions a bit early and pay this repair out of 2016 funds. Recall that our 2015 year was a year-off in contributions since we had a double in 2014.
The total cost was: $1,539.65 including taxes.
| Item | Amount | Cost |
|---|---|---|
| Class A Gravel | 15.21 Tons | $288.83 |
| Shale | 1 loads | $150.00 |
| Machine Time (mini excavator) | 4 hours | $280.00 |
| Machine time (moving it around) | 1 lot | $70.00 |
| Culvert | 1 ea. | $550.00 |
| Subtotal | $1,388.83 | |
| Tax (HST) | $200.82 | |
| Total | $1,539.65 |
Receipt below:
This picture shows the upstream side of the new (2015 December) culvert with moderately low water level.
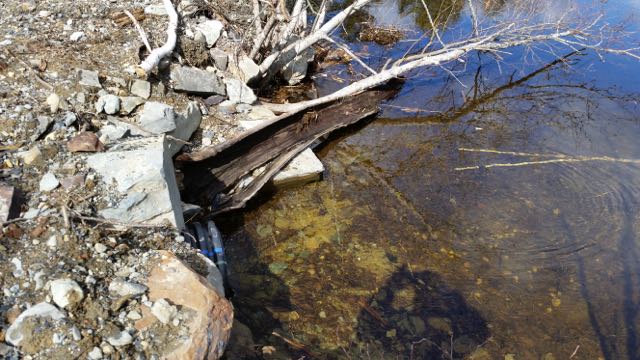
The downstream side flowing well after removing some beaver dam blockage in the culvert.
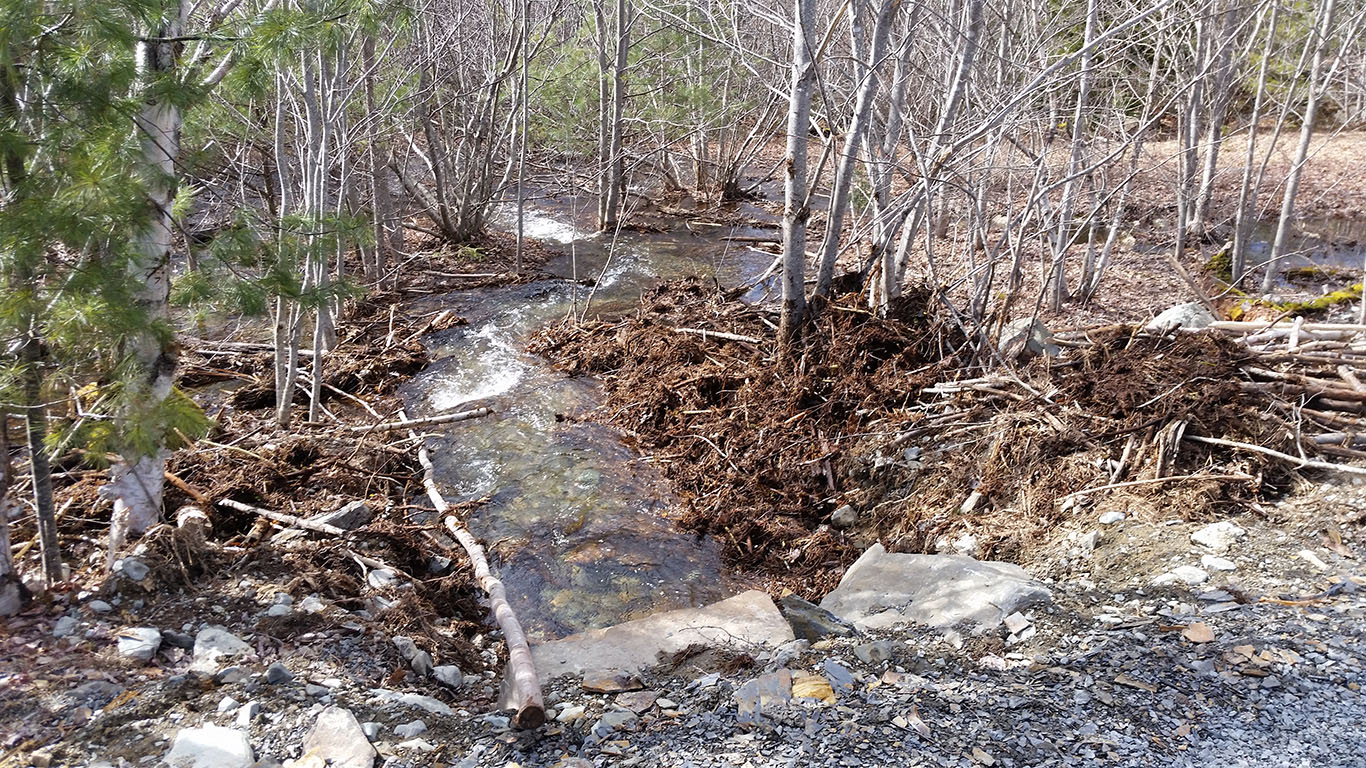
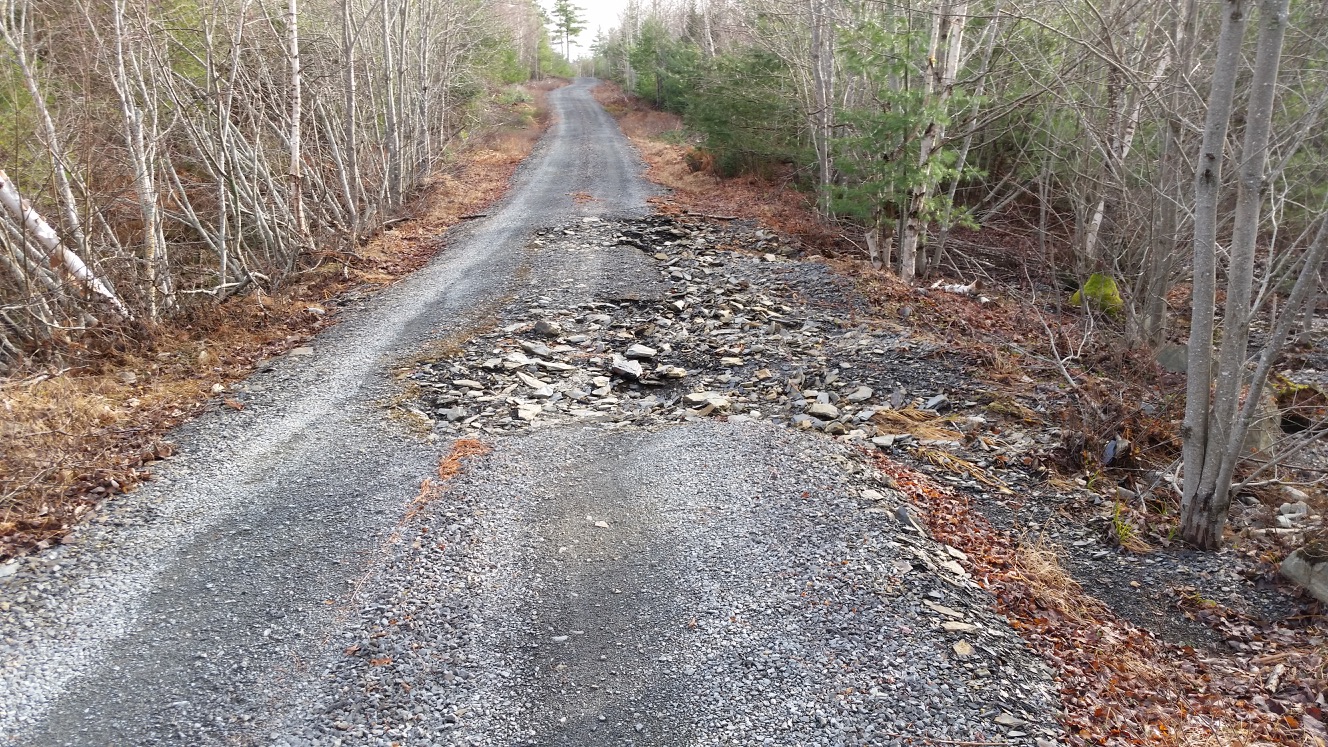
One photo of the washed out road before the repair. It was a particularly heavy rain.
- Details
- Written by: Bob Allan
- Category: road
- Hits: 4200
We concentrated on a stretch of road we call "the hill" this year. We were concerned that stretch of road may wash out. There was more work to that stretch than a single year's total contributions so thanks to all those who doubled-up this year. We made it.
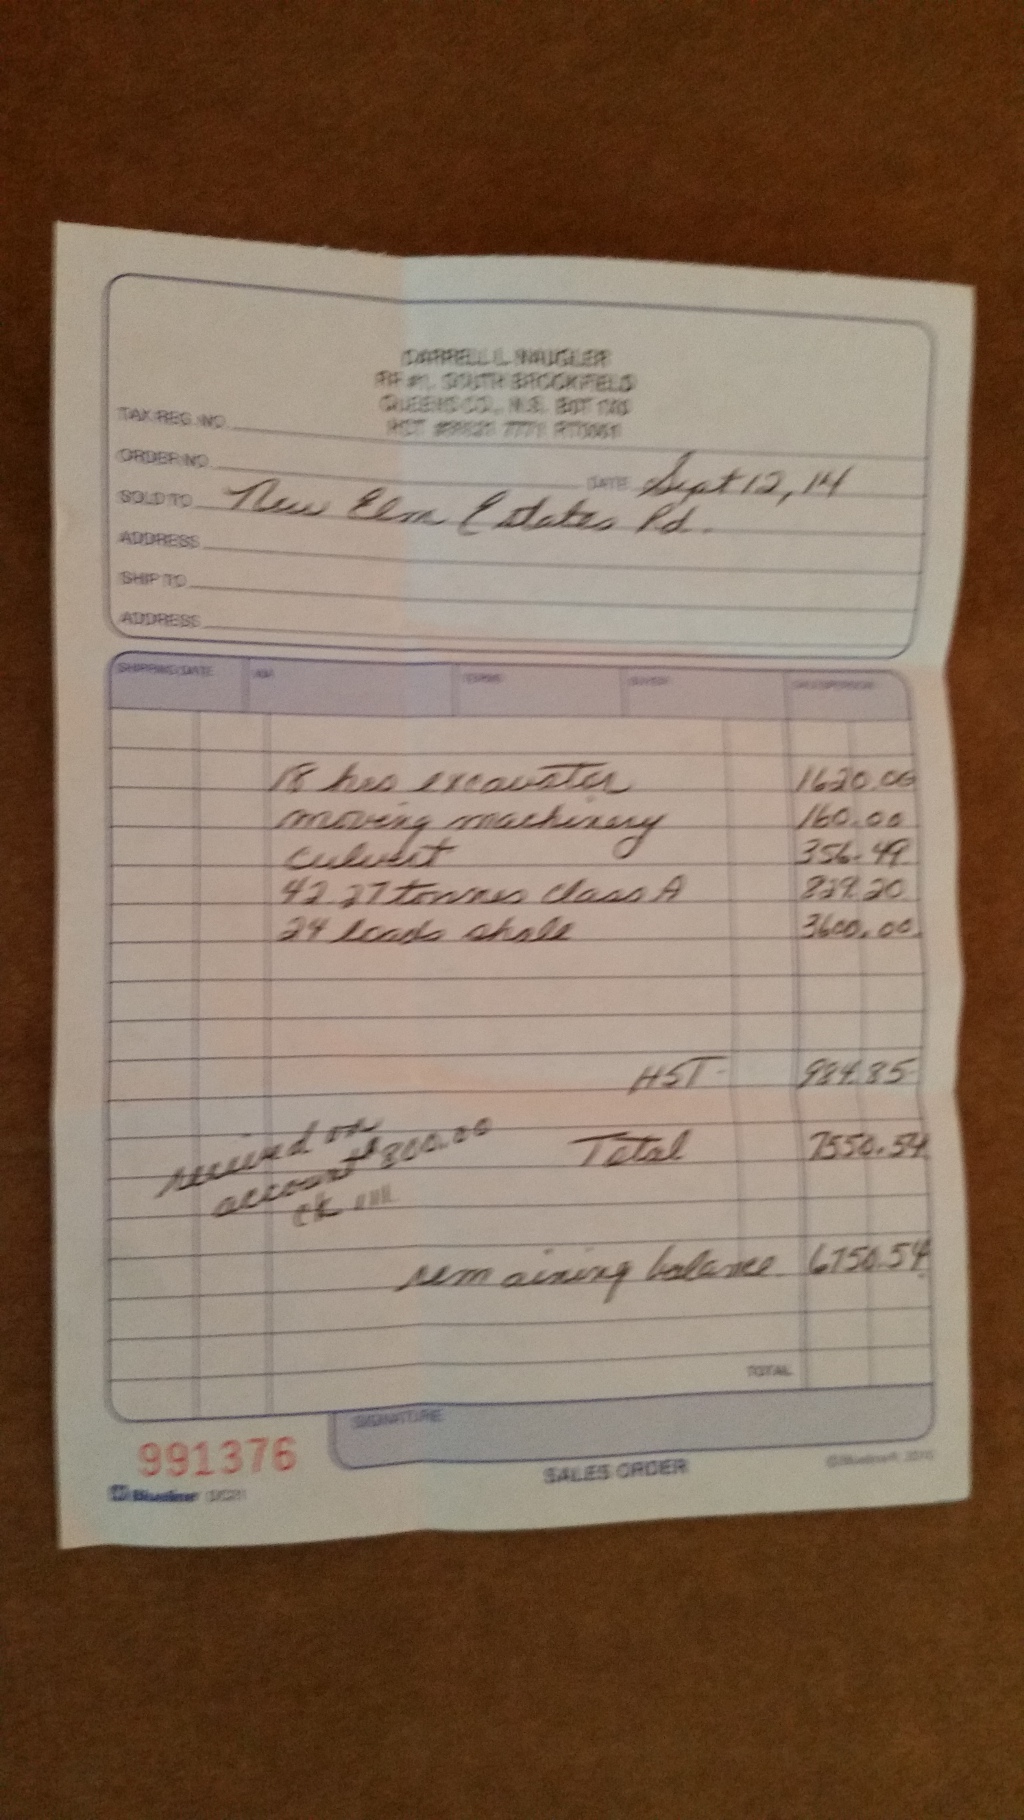
Our contractor, Darrel Naugler, did a bang up job again and brought the job in right on our budget. We attach his invoice to us below. The work was:
Excavator, 18 hours : $1620.
Moving machinery : $160
Culvert : $356.49
Class A gravel, 42.27 tons : 829.20
Shale, 24 loads : $3600.
Tax : $984.85
Total: $7550.54
The lot owners worked hard on the woods-work and clearing along the edge of the road. Starting at the hill where that work was needed before the construction work and continuing a good long stretch down the hill and in the road. We have cleared several other stretches along the road particularly where the trees hang down under snow load and in places where the sun was not reaching the road to dry it up.
More recently we have cut small drainage channels from some of the deeper puddles. We think this may help dry up the road a bit between rainstorms but that is only a stop-gap until the machine work can be done on those parts.
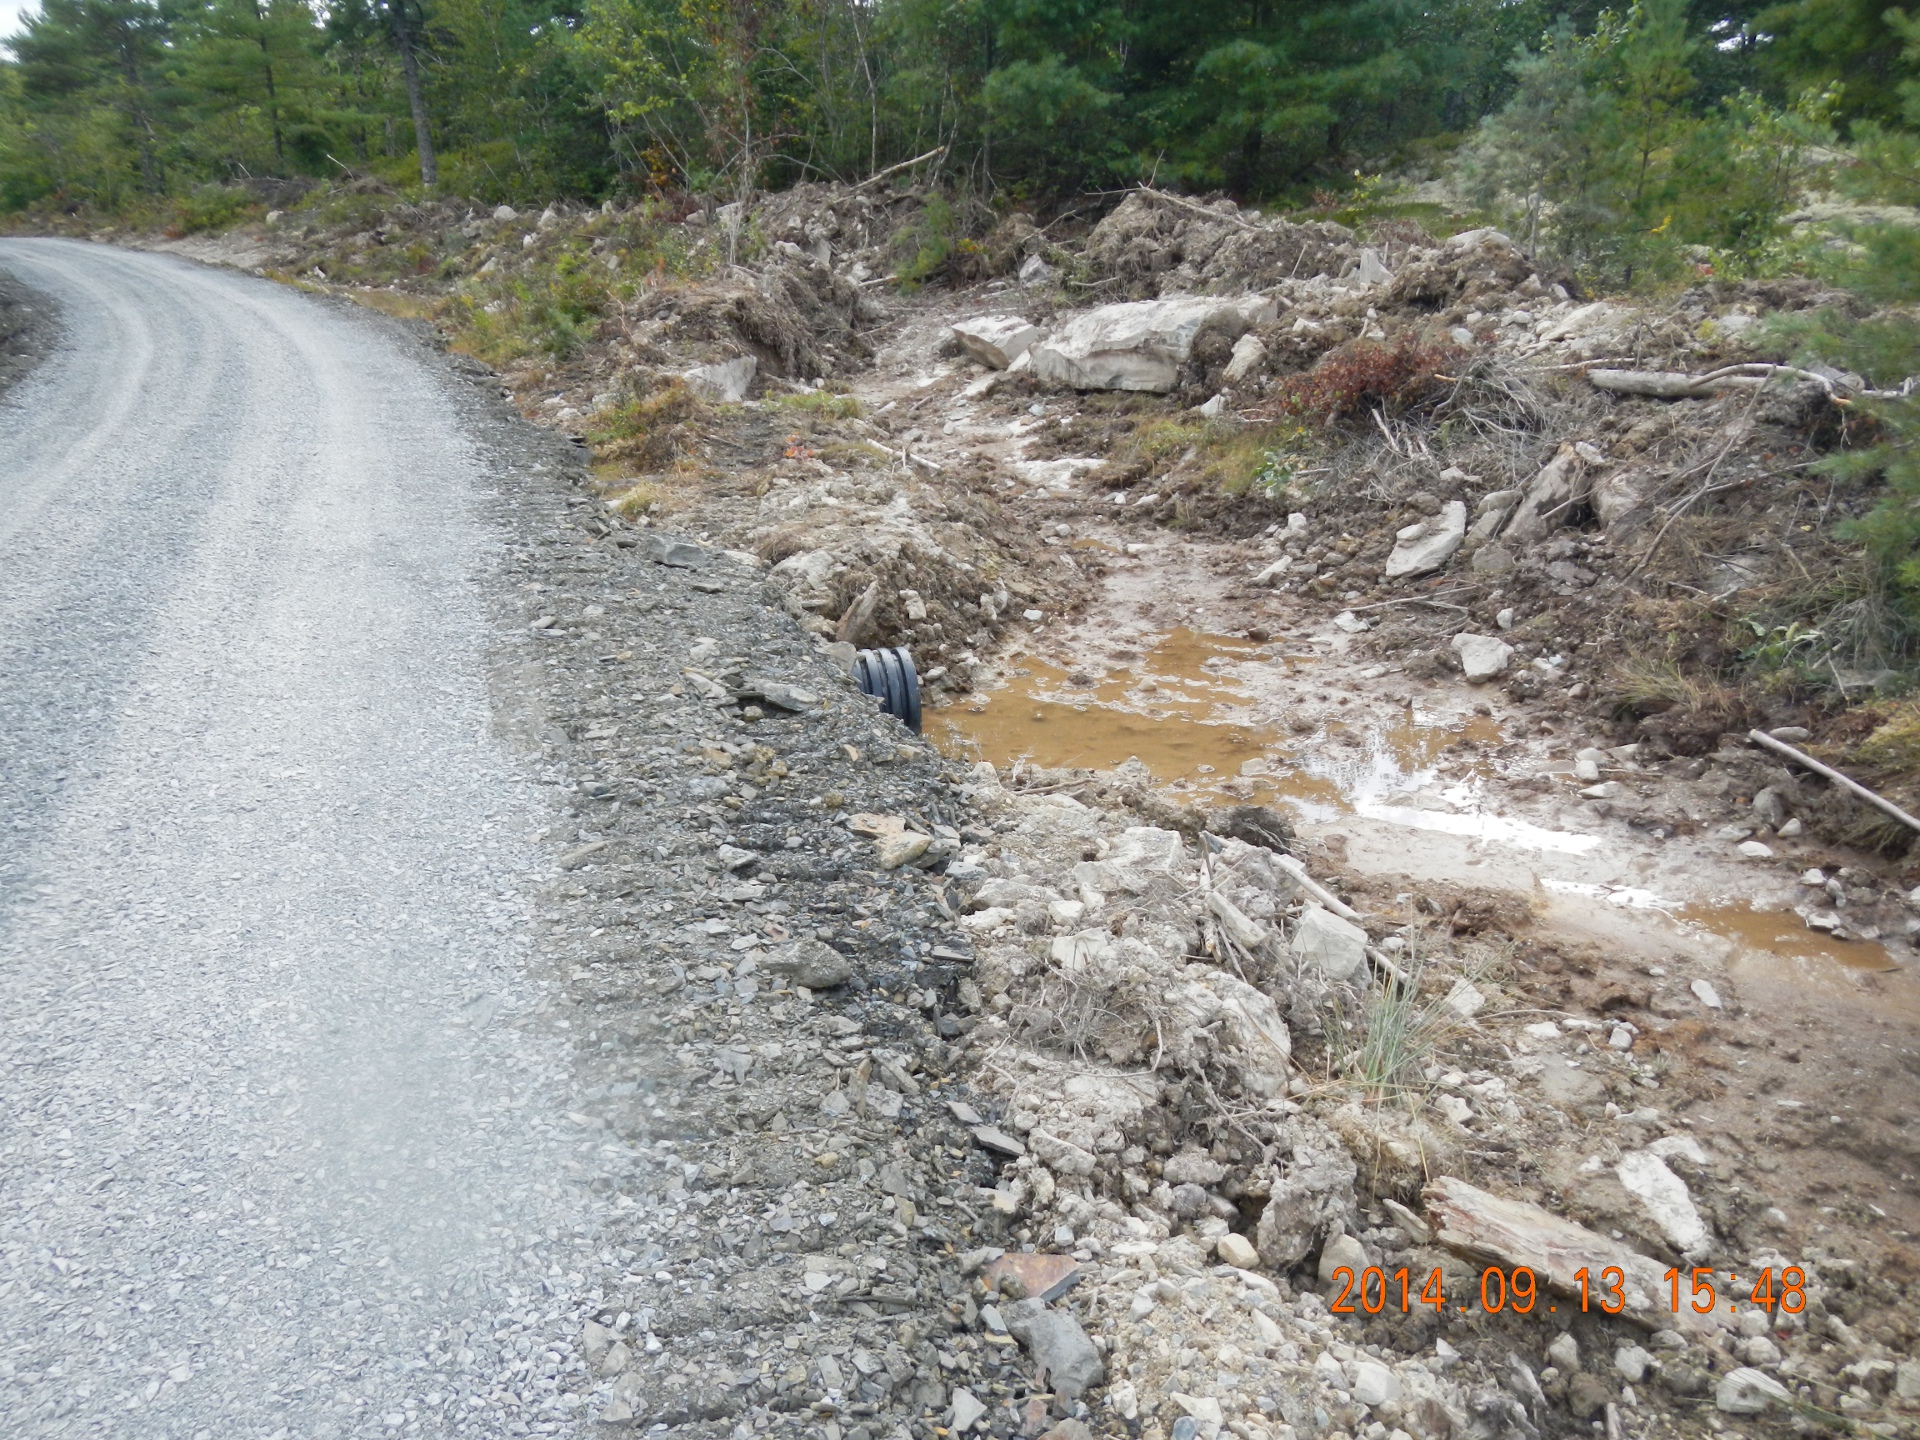
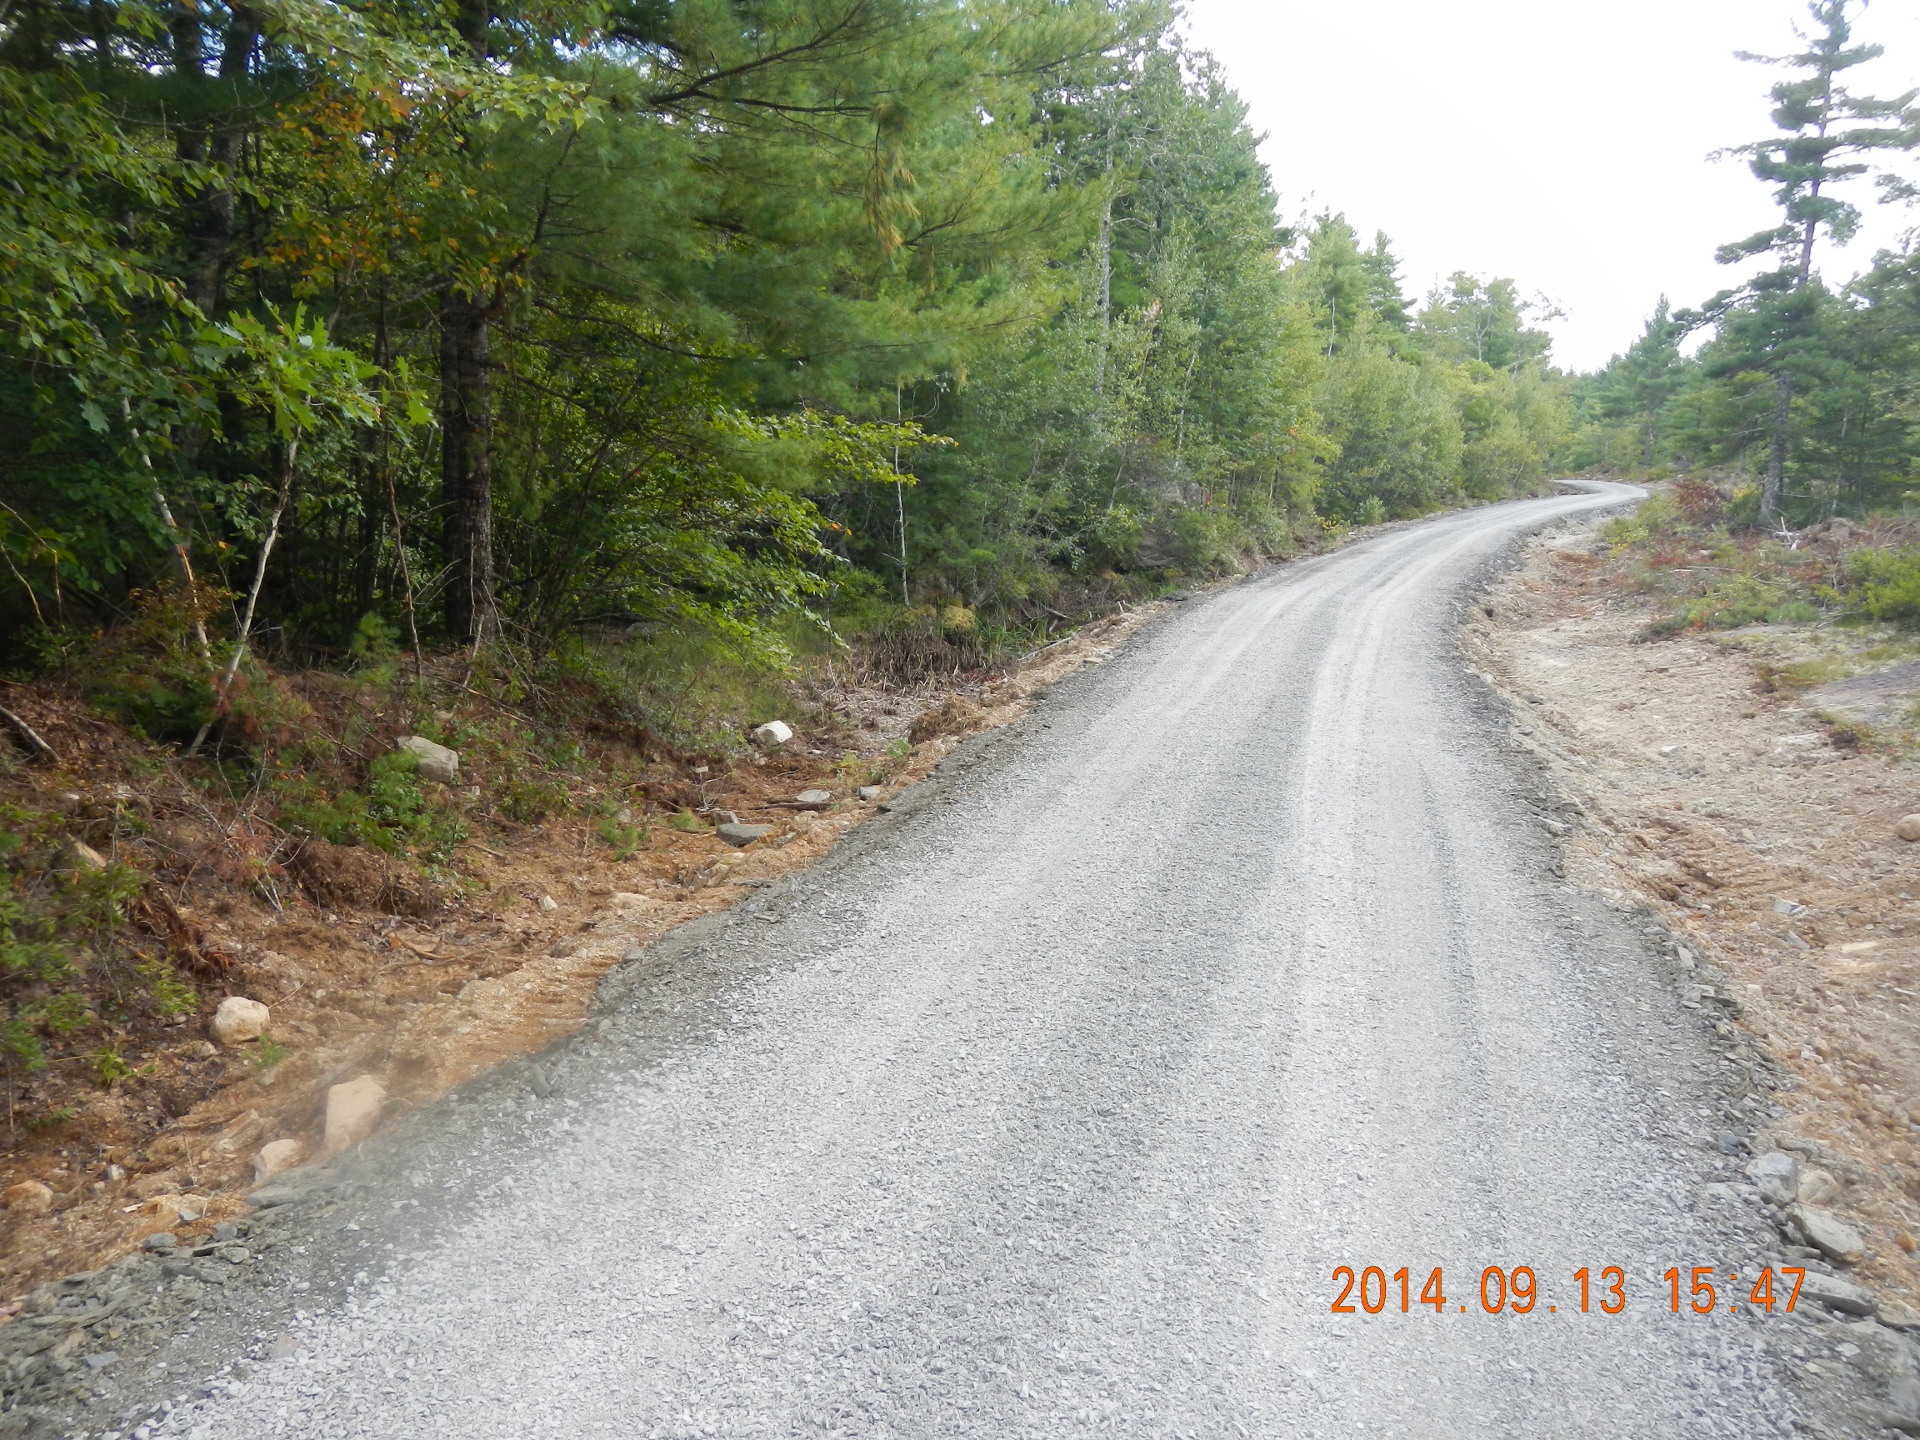
Here is a view of the new roadwork.
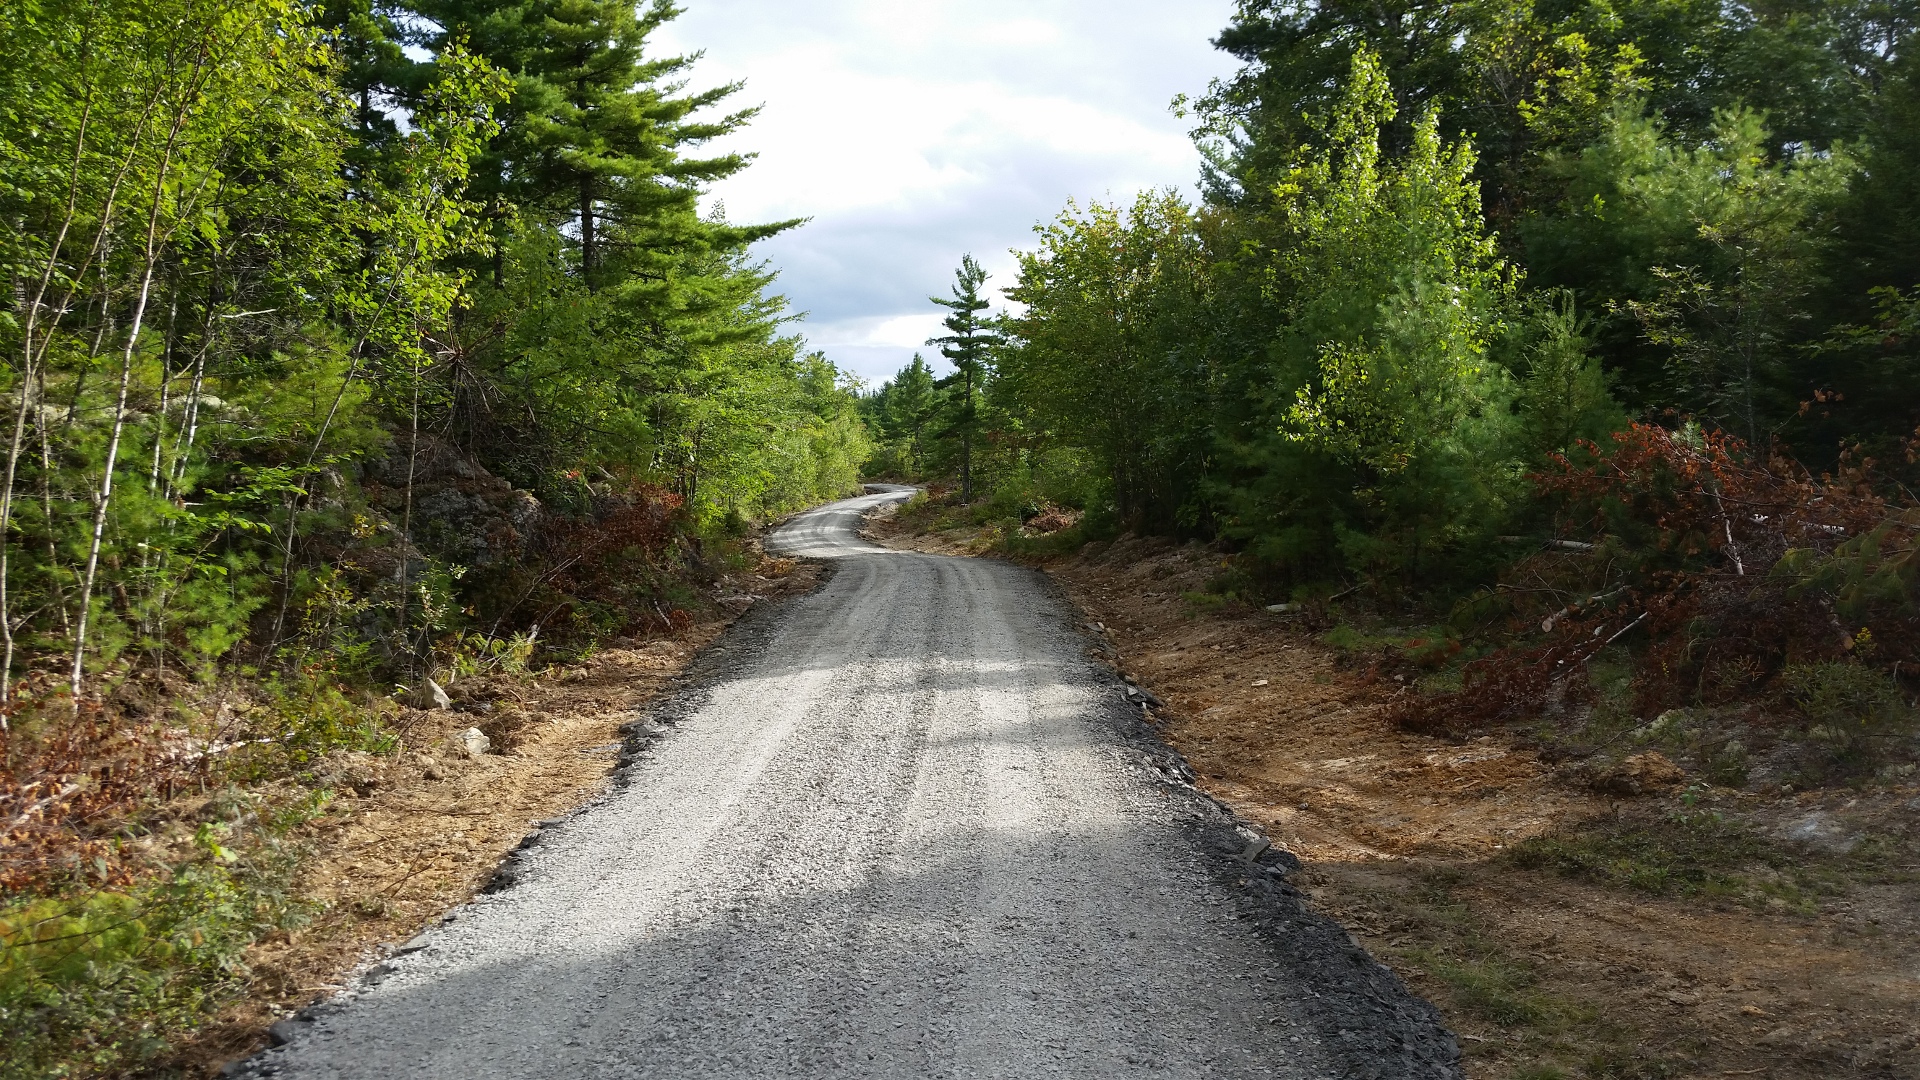
Here is a photo of one end of the culvert.
And another photo with a longer view of the new section.
Take a walking tour of the road with Bob.
New Elm Estates Road 2014 walking tour
NEw Elm Estatates Road, 2014 maintenance and inbound driving tour
- Details
- Written by: Bob Allan
- Category: road
- Hits: 3955
2013 maintenance:
The residents did some woods work to clear back from the road surface. We agreed that we should make the clearing wider - at least 8 to 10 feet back from the edge of the road surface.
We note that the right-of-way is a 66 feet wide. The single lane sections of road are about 14 feet wide. We could clear back about 25 feet from the edge of road surface on each side (33 feet from the centre line) and still be within our right-of-way.
Some of us noticed that one part of the road is washing out more than others. It is on a hill. We call it the wash hill in the maps. We did some woods work clear into a ditch on each side of the road at the top of the hill; mostly so we can see the ditch and discuss with our contractor. We also did a large section of clearing between the road edge and the far side of the ditch starting at the bottom of the hill and running most of the way to the top. We may likely finish that ditch on the east side of the road sometime this year. We are discussing the approach to upgrade that piece of road on the wash hill and all suggestions are welcome.
All that machine work starts with just-plain work clearing trees along the shoulder with chain saws. We know of at least one dedicated guy who would rather do that in the rain than the bugs - now that's a maritime Canadian eh!
Stay tuned to this spot for an update on the work we did in 2013. More pictures coming soon.
Our contractor did another outstanding job this year and we made good progress. We extended our re-surfacing about 750 feet (230 m) further north. We crossed a low wet area adding elevation to the road surface with gravel and we graded the shoulder over another short wet stretch further north from the end of the new surface. We didn't make it to the gravel pit - oh so close.
This photo shows the place where the 2012 ended and the 2013 work began. Spot the boundary where the top-coat gravel on the new (2013) work is a lighter shade. We took this picture during the construction.

This next photo shows the shale interrupted over a wet land section where we used gravel instead.
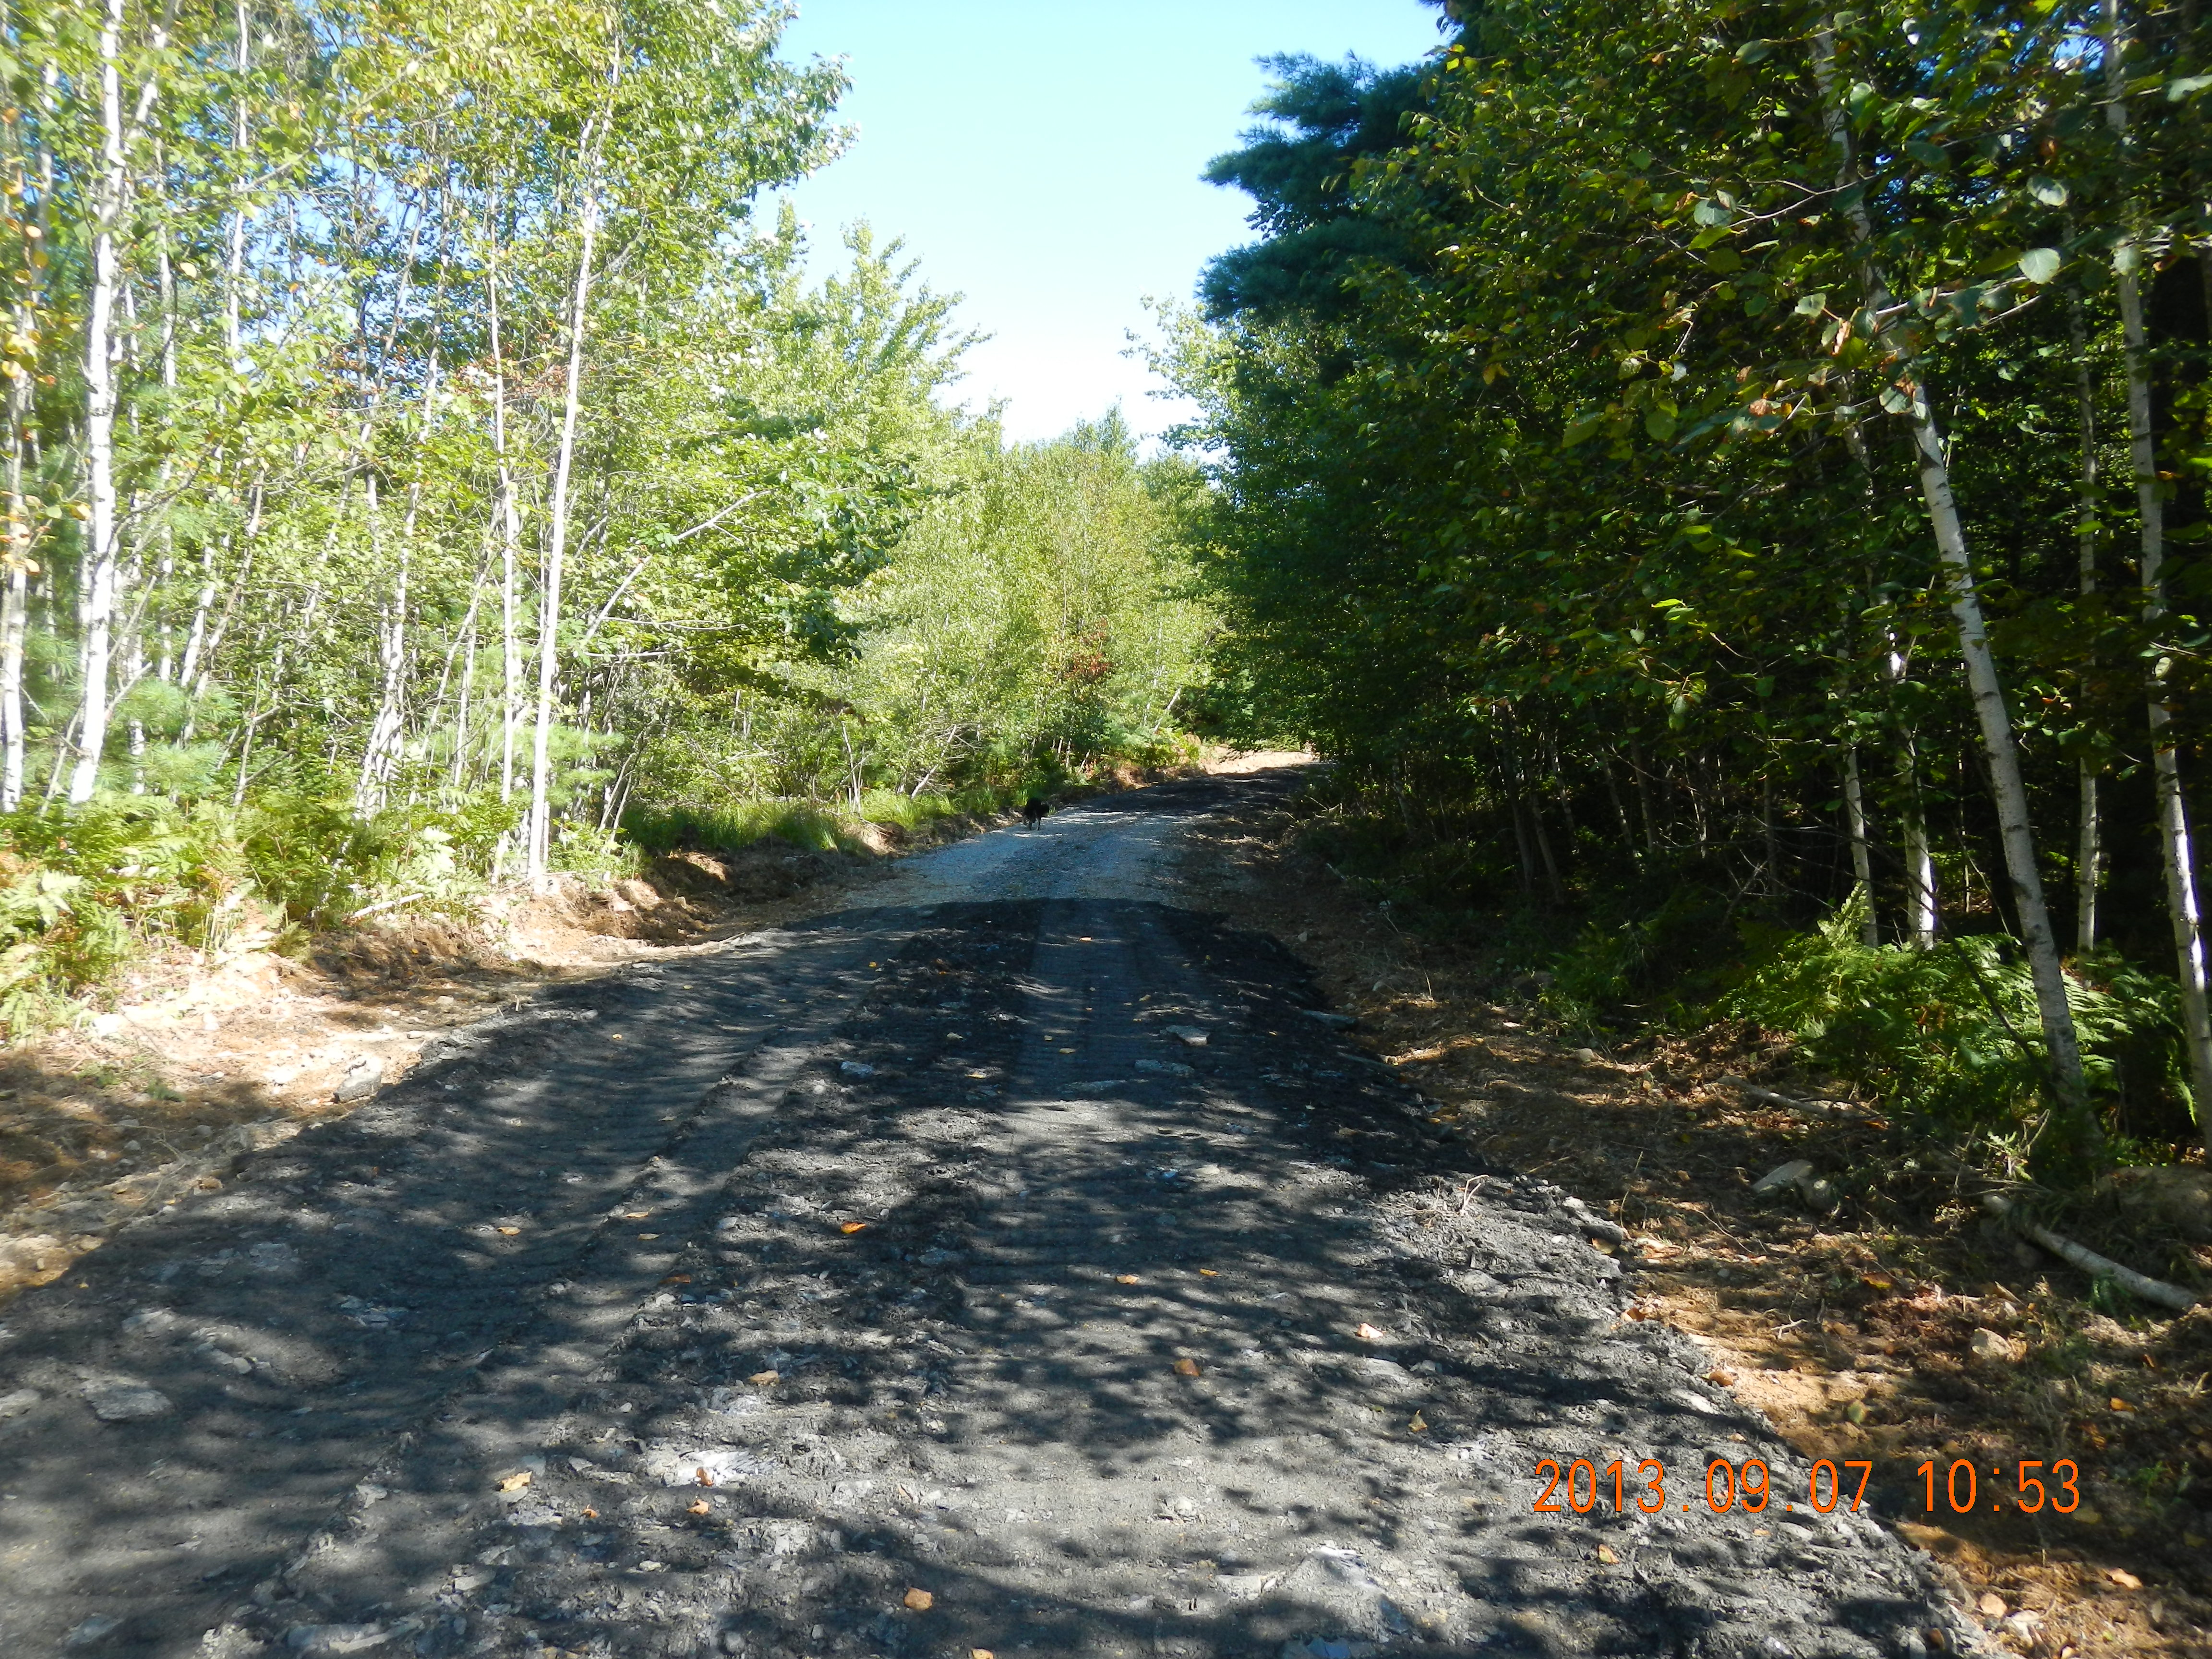
This photo below shows the work in progress. This is what it looks like with just shale before the top-coat of class A gravel. You can see the graded shoulder for drainage and the elevation of the shale layer. The new layer is thicker in some places than others to get drainage and cover bumps and hollows.
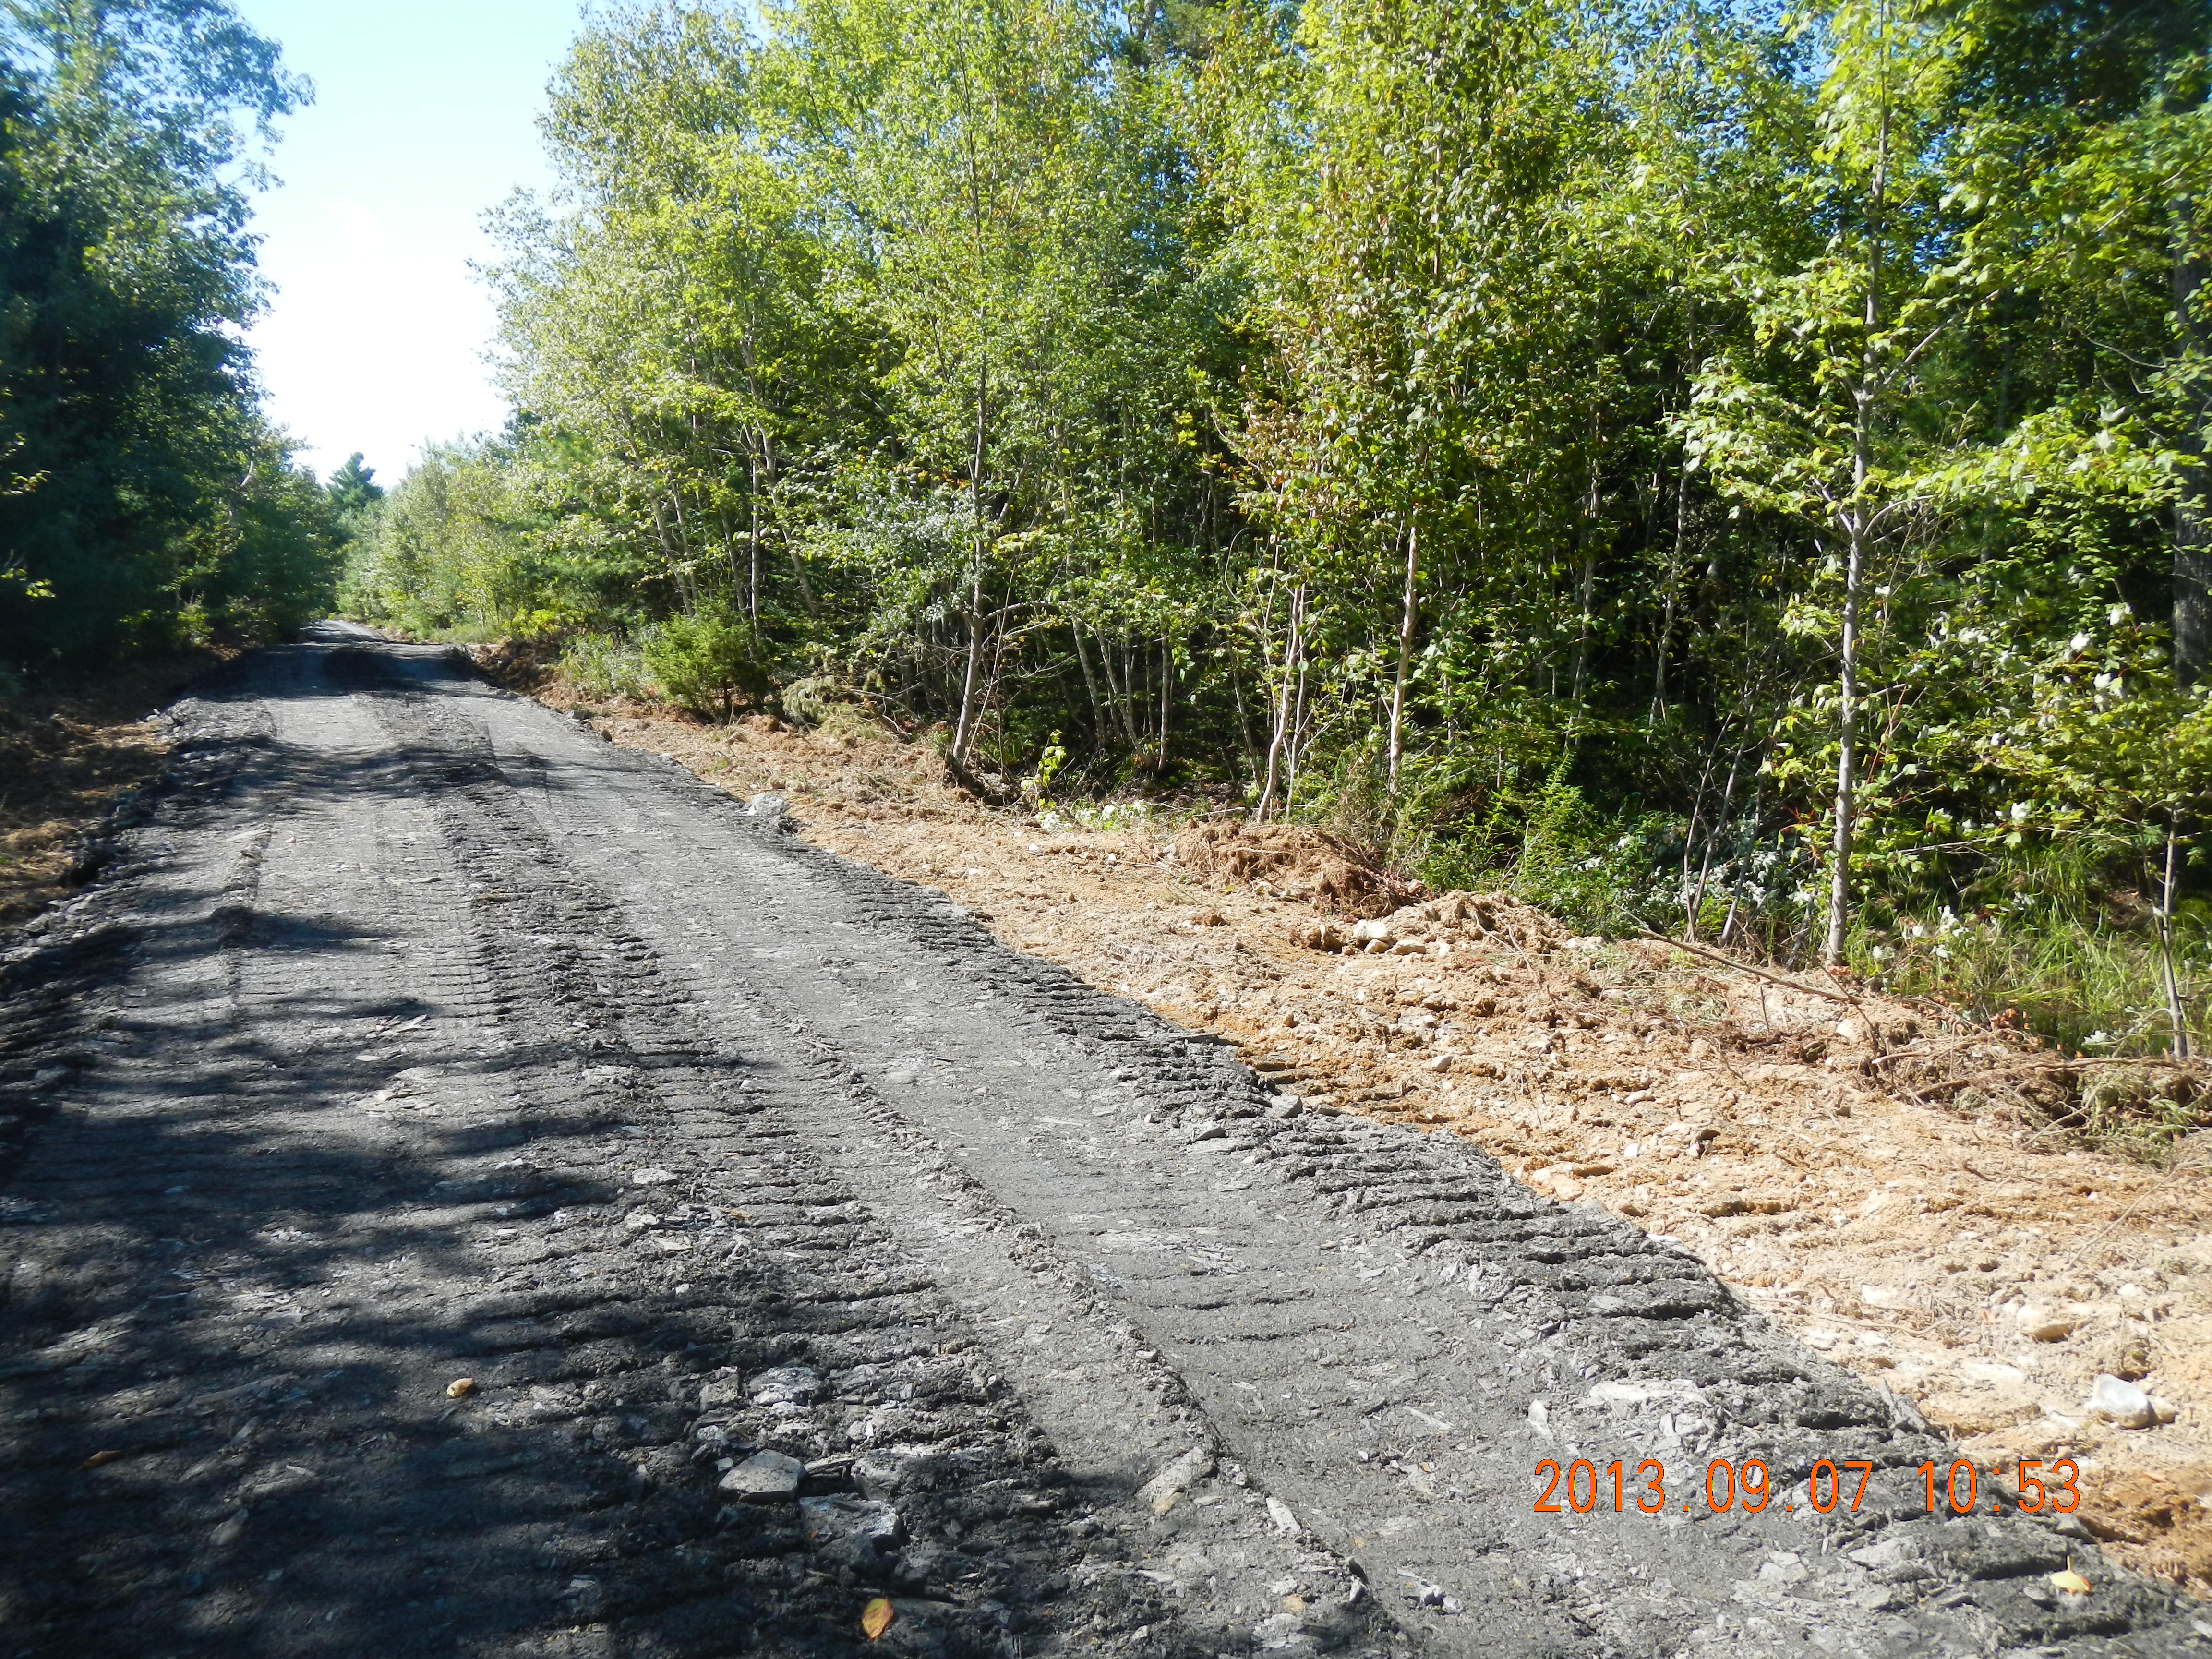
Here is another photo showing the end of this years (2013) work. The view is looking south as we drive in the road and come upon the new road surface. You can see the shoulders are graded back to the ditch on either side beyond the end of the new surface. This was a bit of a low gully in earlier times; but, it was dry when other parts were wet on the 17th of November, 2013.